Valetudo
Cloud replacement for vacuum robots enabling local-only operation
View the Project on GitHub Hypfer/Valetudo
General
Newcomer Guide Why Valetudo? Why not Valetudo? Getting Started So you've been banned? Supported Robots Rooting Essentials Buying Supported Robots Media & Content Creators
Installation
Usage
Implementation Overview Capabilities Overview Upgrading Firmware Updates
Companion Apps
Valetudo Companion (Android) Valetudo Tray Companion Valeronoi Lovelace Valetudo Map Card I Can't Believe It's Not Valetudo node-red-contrib-valetudo Fun & Games Other Noteworthy Projects
Integrations
MQTT Home Assistant Node-RED openHAB
Misc
FAQ Style Guide Troubleshooting
Development
Home Assistant Integration
The main platform you’ll probably be using Valetudo with is Home Assistant.
Connecting Valetudo to Home Assistant
Valetudo connects to Home Assistant via MQTT + the MQTT Autodiscovery Feature of Home Assistant. This means that to connect Valetudo to Home Assistant, you will need an MQTT broker on your network
For this, Mosquitto is the recommended choice. It is available in every relevant linux distribution, can be dockered and can also be installed as a HAOS Add-On if you run the appliance version of HA.
It also has barely any resource footprint, meaning that there’s nothing to worry about if you just run it for Valetudo. Even more so, considering that it definitely won’t stay like that for long. Smarthome is a very slippery slope. :)
However you deploy the Mosquitto MQTT Broker, once deployed, you just point both Home Assistant and Valetudo at the same broker and then automagically a new Device + its Entities will appear in Home Assistant.
If it does not appear, make sure to check the Logs in HA, the Broker and also Valetudo. Usually, it’s a network-related or ACL issue.
Also, keep in mind that MQTT Autodiscovery will not create a “New devices discovered on your network” notification in Home Assistant. The new Valetudo Device will just be there.
Building Dashboards with Valetudo
If you’d for example like to use the Valetudo Iconset as part of your Dashboards, check out this repository: https://github.com/Hypfer/hass-valetudo
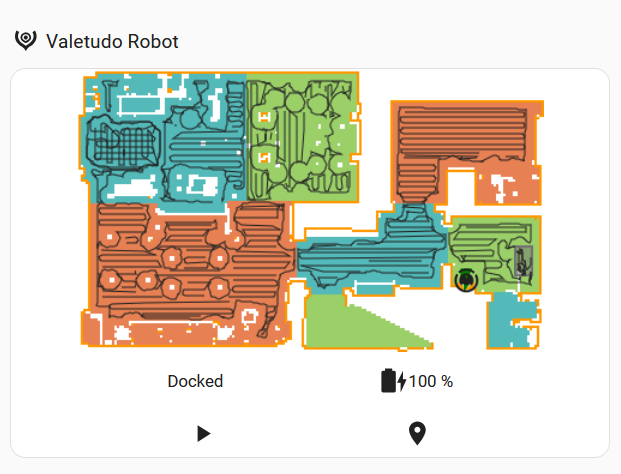
To display the map of your robot in a Home Assistant dashboard, the Valetudo Map Card is used. Setup instructions for that can be found on hass.valetudo.cloud.
Interacting with Valetudo
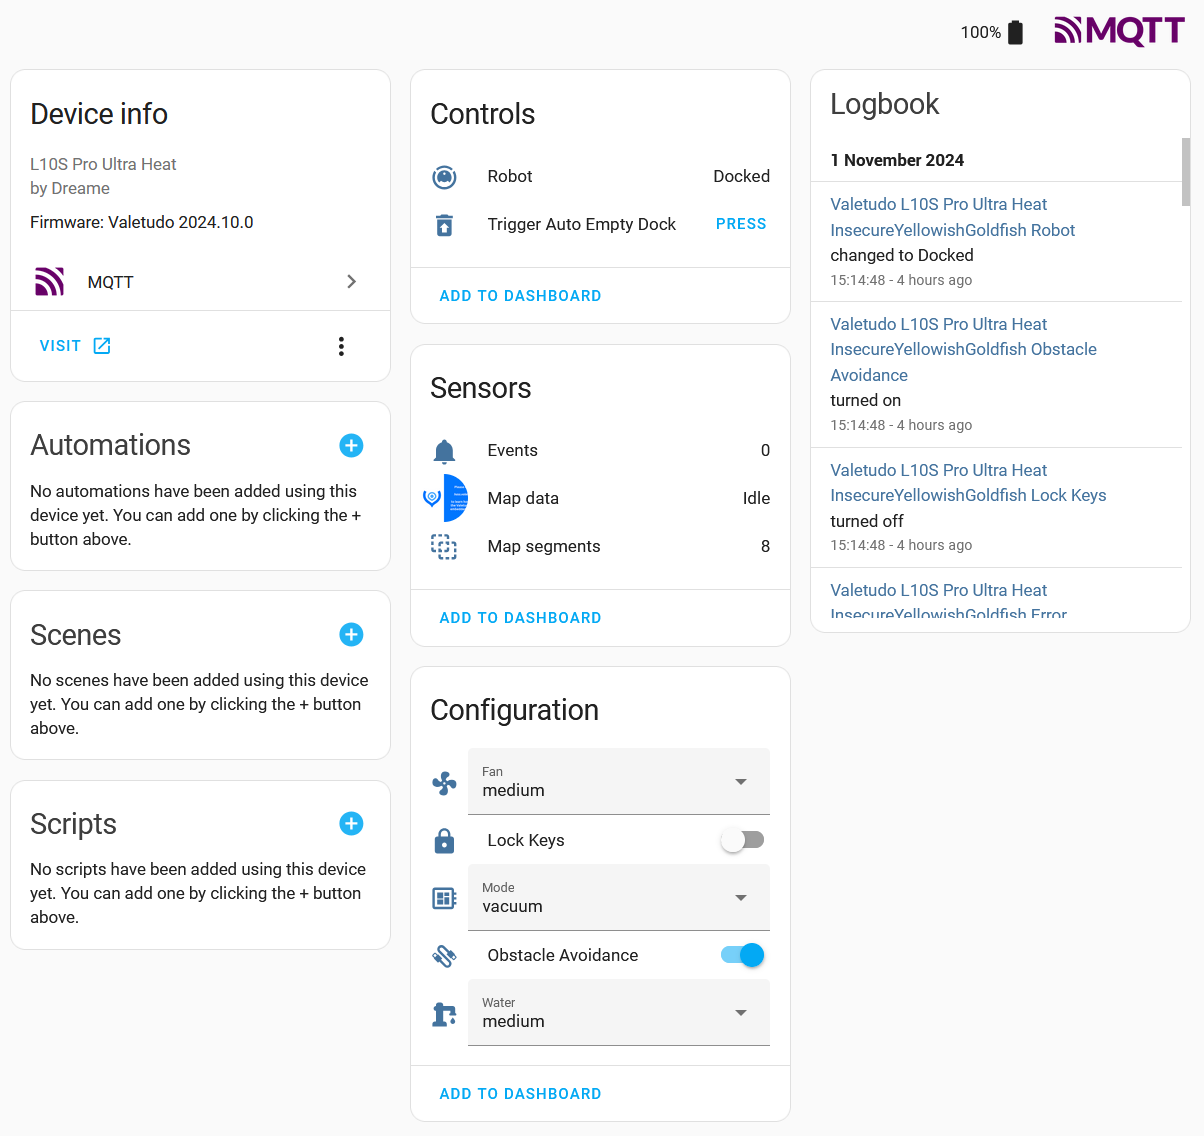
Basic interaction with Valetudo is done via the autodiscovered entities. They will allow you to observe state, toggle settings, trigger the auto-empty feature, start full cleanups and all that.
For more sophisticated use-cases like e.g. cleaning specific segments, the mqtt.publish action is used.
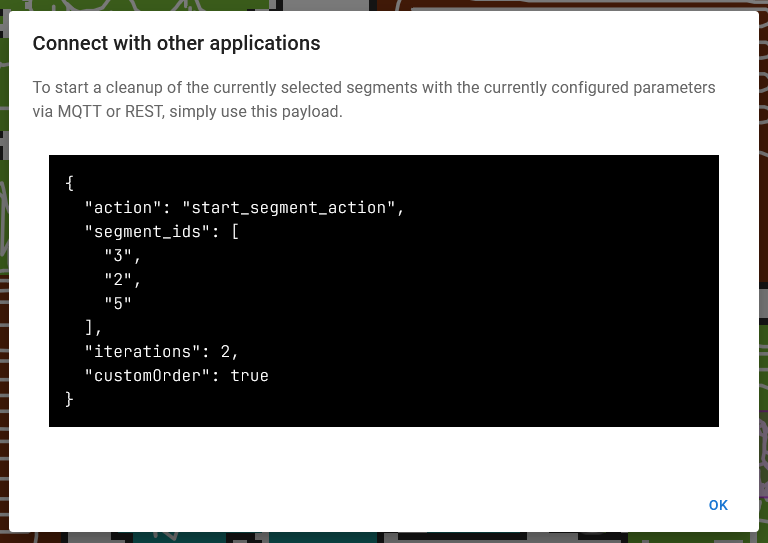
To determine the right payloads for your specific setup, in the Valetudo UI, simply configure/select the segments/zones/go-to locations like you’d normally do and then long-press the button that would start the action. This will bring up a dialog providing you with everything you’ll need:
To determine the right topic to publish that payload to, first determine the base topic by visiting Connectivity - MQTT Connectivity in the Valetudo UI:
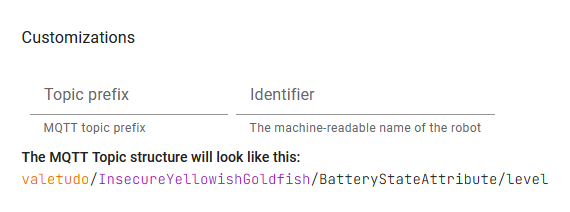
Then, look up the rest of the topic + any other considerations for the desired Capability in the MQTT documentation.
For the example in these screenshots, the full service call would look like this:
action: mqtt.publish
data:
  topic: valetudo/InsecureYellowishGoldfish/MapSegmentationCapability/clean/set
  payload: '{"action":"start_segment_action","segment_ids":["3","2","5"],"iterations":2,"customOrder":true}'
Valetudo
Cloud replacement for vacuum robots enabling local-only operation
View the Project on GitHub Hypfer/Valetudo
General
Newcomer Guide Why Valetudo? Why not Valetudo? Getting Started So you've been banned? Supported Robots Rooting Essentials Buying Supported Robots Media & Content Creators
Installation
Usage
Implementation Overview Capabilities Overview Upgrading Firmware Updates
Companion Apps
Valetudo Companion (Android) Valetudo Tray Companion Valeronoi Lovelace Valetudo Map Card I Can't Believe It's Not Valetudo node-red-contrib-valetudo Fun & Games Other Noteworthy Projects
Integrations
MQTT Home Assistant Node-RED openHAB
Misc
FAQ Style Guide Troubleshooting